This tutorial explains how to migrate your old Icy plugin project (Eclipse) to a Maven project using our template.
It will guide you using a concrete example (converting the Intensity Projection plugin) through the followings steps:
- Pre-requisites
- Converting Eclipse project to Maven project
- Setup POM file
- Building the project
- Testing
Pre-requisites
As we use Maven to manage Icy development project, it is advised to install it before continuing this tutorial. For that you can check our instructions to set up your development environment and specifically the Maven section, as you should already have Java and Eclipse installed. Also, if you’re not familiar with Maven, please consider reading this introduction to Maven first.
Converting an Eclipse project to a Maven project
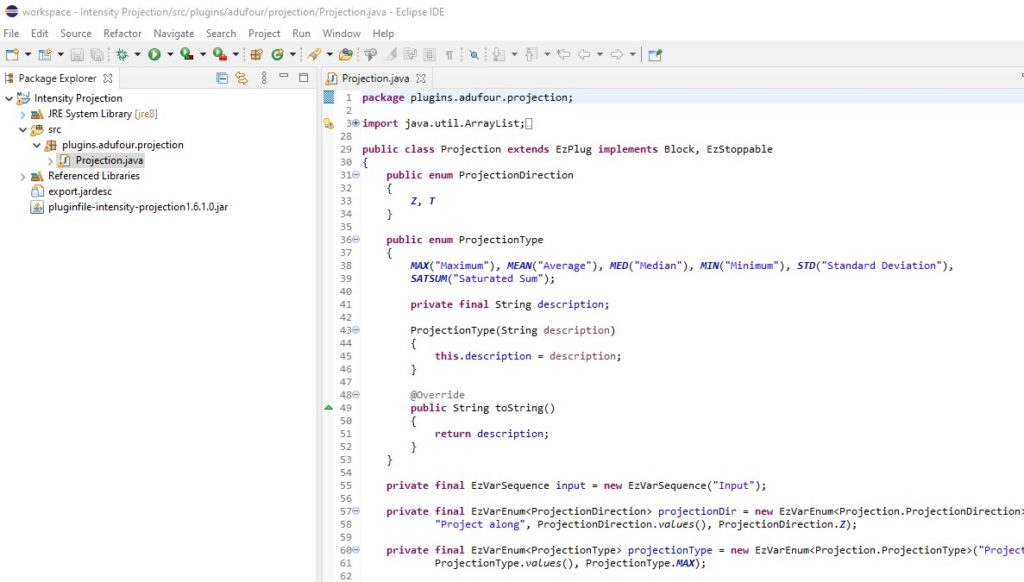
Here is our Icy plugin Eclipse project Intensity Projection. We want to convert it to a maven project.
Eclipse has a function to do that quickly and generate the required pom.xml file:
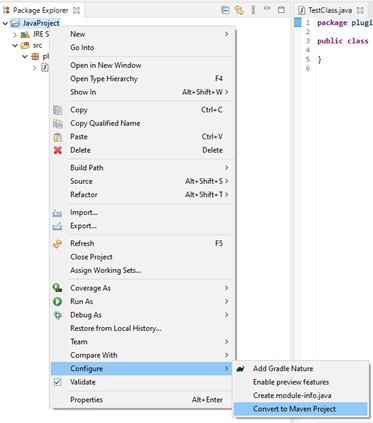
But here we won’t use it. Instead, we will directly use the POM from our plugin template which contains a lot of things already preset for us, following these steps:
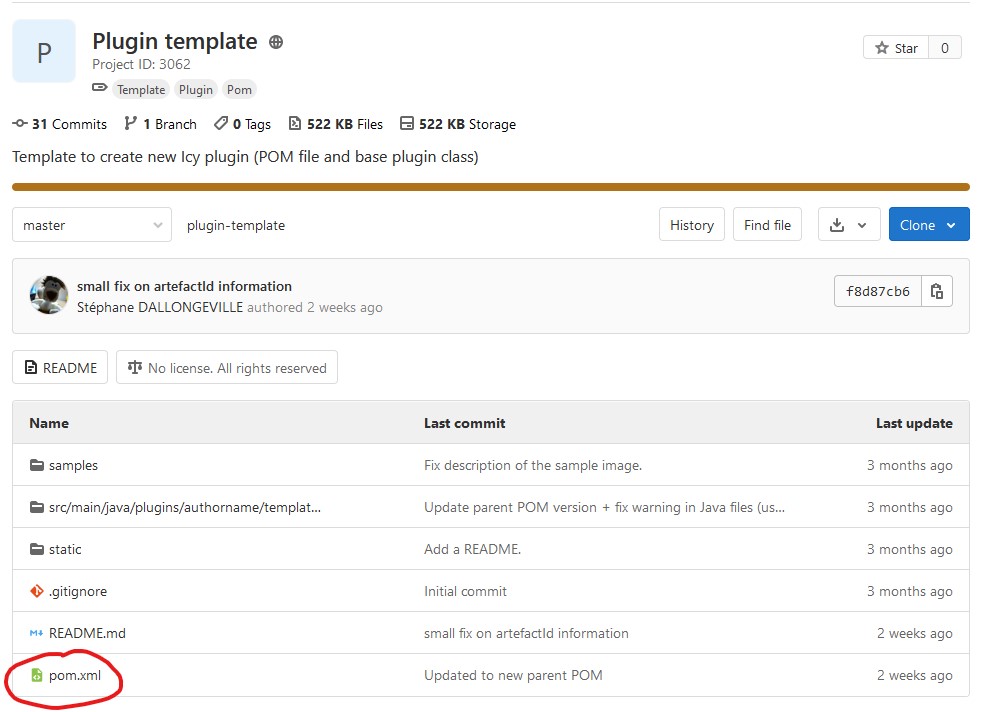
- We start by downloading the POM file from the plugin template page.


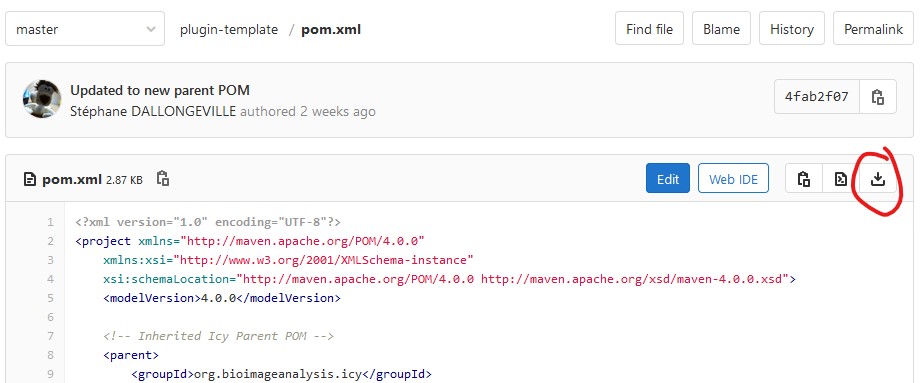
Direct link to the pom.xml file:
https://gitlab.pasteur.fr/bia/plugin-template/-/raw/master/pom.xml?inline=false - We copy the obtained pom.xml file into the project folder:

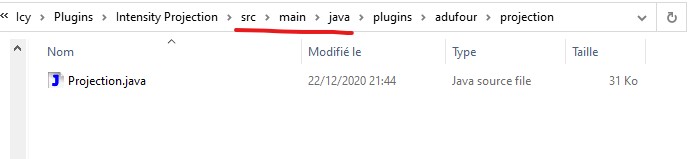
- Then we need to fix the java source folder structure to fit to Maven standards. For that, we need to rename our base src folder to src/main/java.
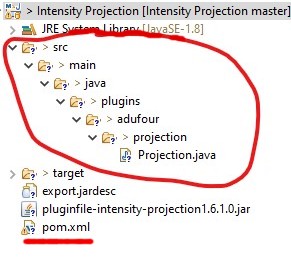
Here is how it looks for our Intensity Projection project after the changes:

- We refresh the project under Eclipse to make the new folder tree and the pom file appear:

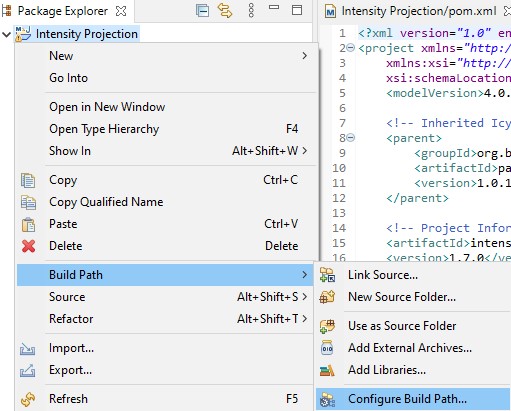
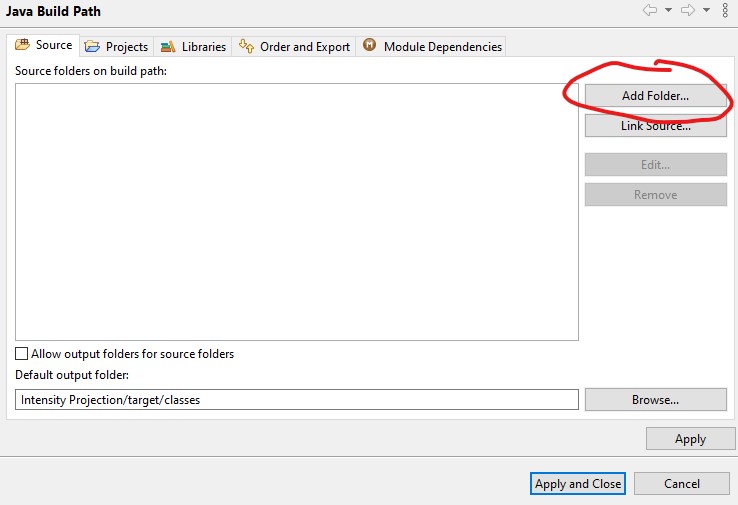
- Now we need to fix the source folder in the Build Path settings from the project.
We right click on Project root and select Build Path –> Configure Build Path

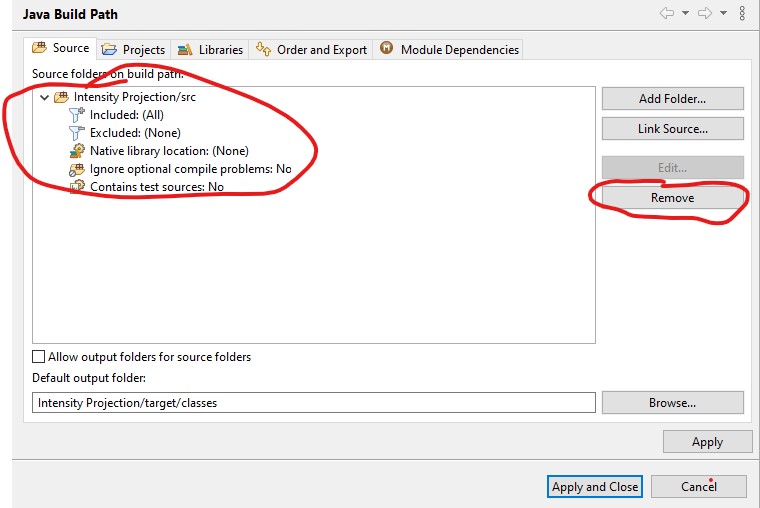
- From Source tab, we select current xxx/src entry and click on Remove

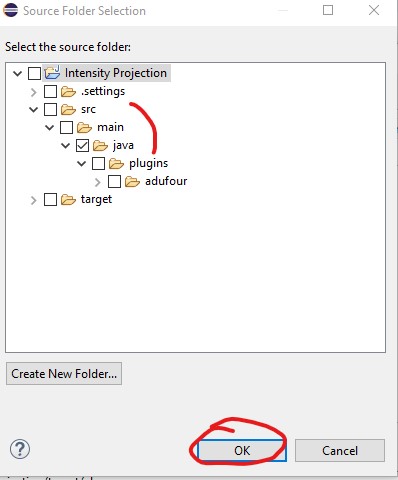
- Then we click on Add Folder…

- We select the java folder in src/main folder:

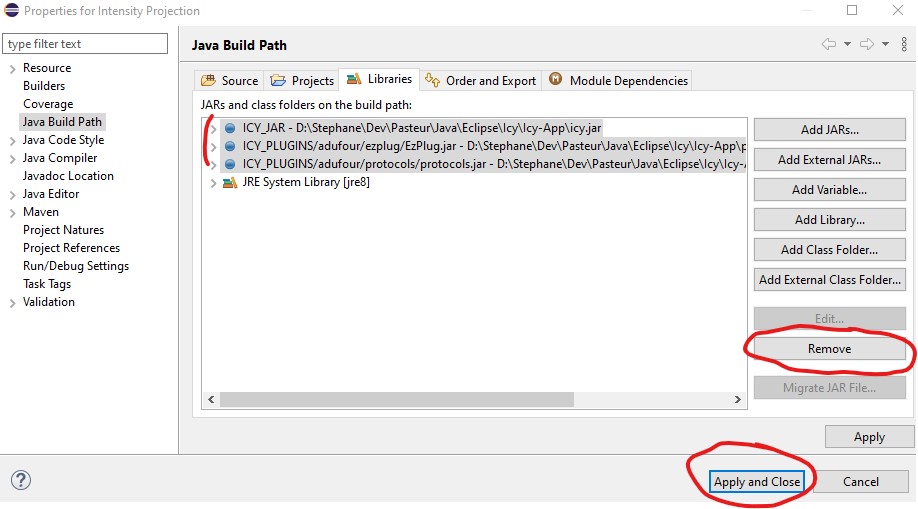
- Then we go to the Libraries tab to remove all Icy JAR dependencies, as they will be handled by Maven now.
Then we validate by clicking on Apply and Close:

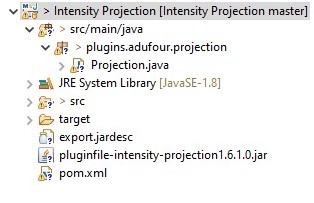
- The project with updated source folder should look like this the image below. You can ignore the errors due to the missing dependencies for now.

- Now we need to change the Nature of the project to tell Eclipse this is a Maven project.
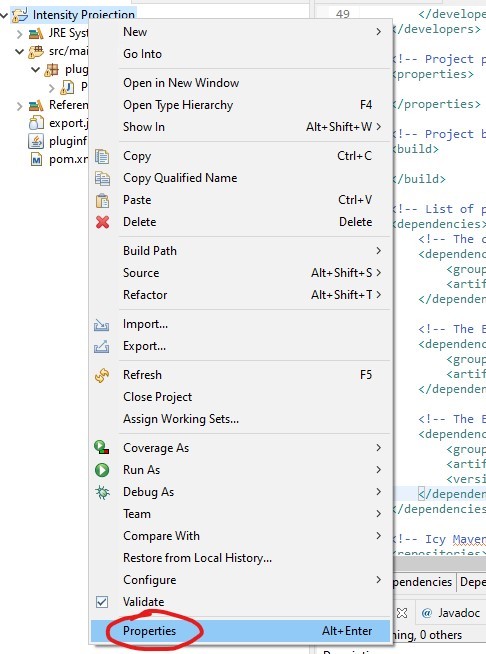
We do that by going to project Properties:

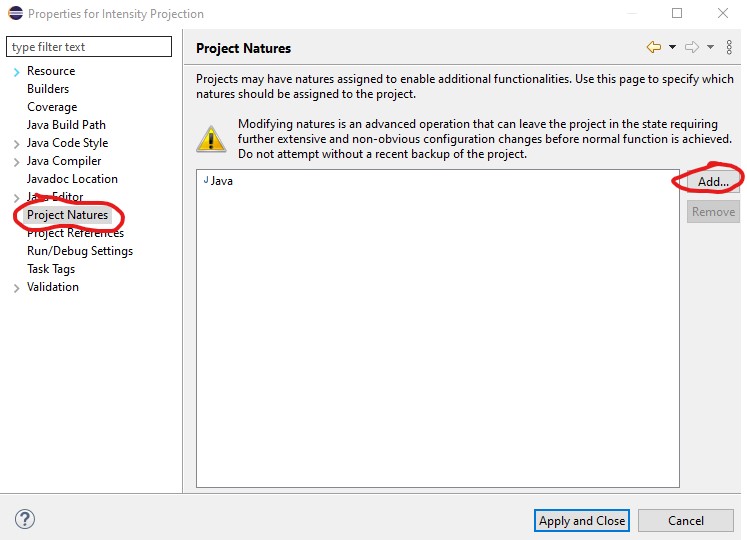
- Then we go to Project Natures and click on Add… button:

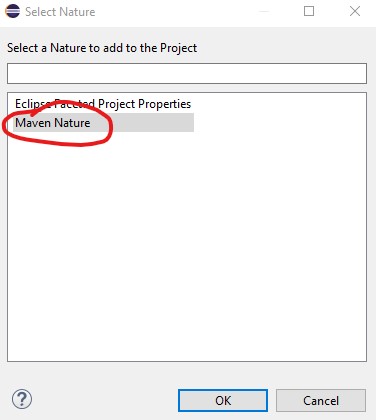
- In the Select Nature dialog, we select Maven Nature and click OK:

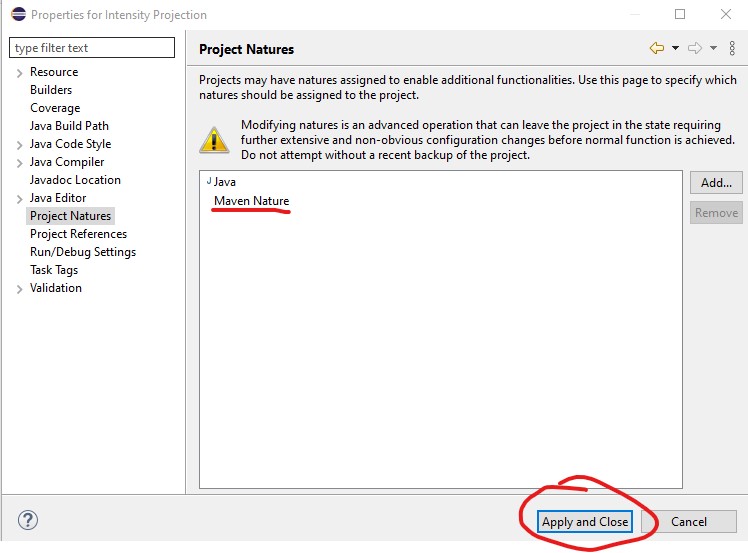
- We validate the new nature by clicking on Apply and Close button:

Now that this is done, Eclipse knows that this project should be handled as a Maven project. You can see that we also keep the Java nature as well, this is important.

Setup POM file
At this point, we have our Eclipse project converted to a maven project. Now we need to modify the POM file according to our plugin information:
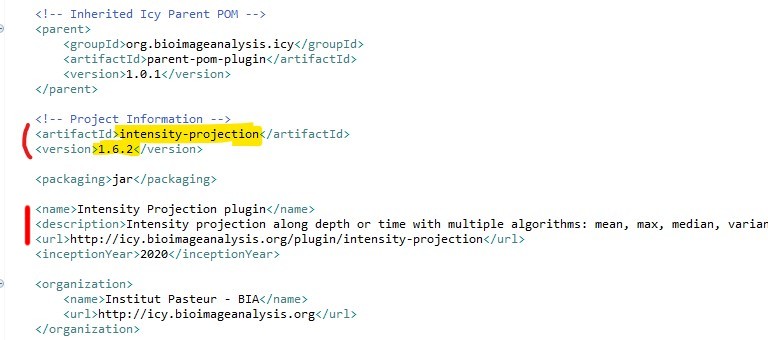
- First we set the artifact id and version number information. We can also set some more general informations as the project name, description, url..:

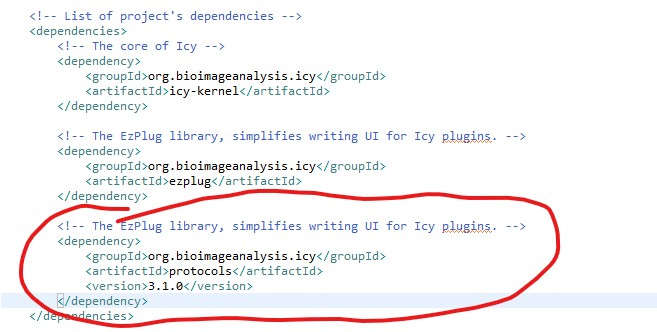
- Then, we need to setup the dependencies of our project (the ones that we removed from the Java Build Path earlier). Hopefully the parent POM already includes some default dependencies for us (icy-kernel, ezplug and protocols). Here the plugin Intensity projection does not need more than these default dependencies, but for the sake of teaching, we will show how to add a dependency (protocols here).
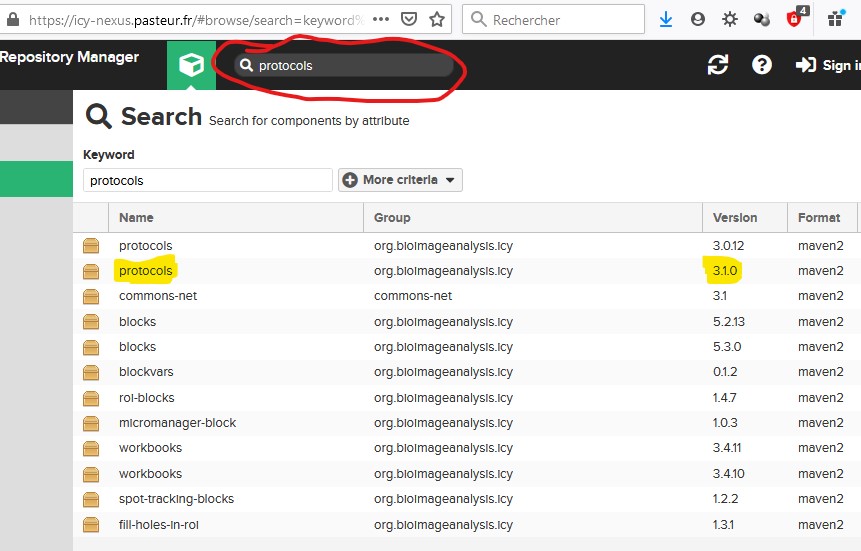
All Icy artifacts are available on the Icy Nexus server and you should search for dependencies directly there. Here we will try to search for the protocols artifact.- We type protocols in the search field from the Nexus repository server. This returns all matching artifacts (can be in the name, description or dependencies):

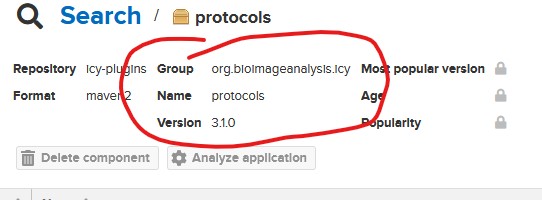
- Here, we want to use the last version (3.1.0) of protocols artifact. We click on it to get the details:

- From the details page, we obtain the group ID (Group), artifact ID (Name) and version needed to fill the POM file. We will use this information to add a new dependency block to the dependencies section of the POM file:

Note that the POM template already contains ezplug and icy-kernel dependencies blocks although they are not required as these dependencies are already presents in the parent POM file. They are here just to show how to fill a dependency block.
- We type protocols in the search field from the Nexus repository server. This returns all matching artifacts (can be in the name, description or dependencies):
- We repeat the process until we have added all required dependencies. Then we’re done with the POM file modifications!
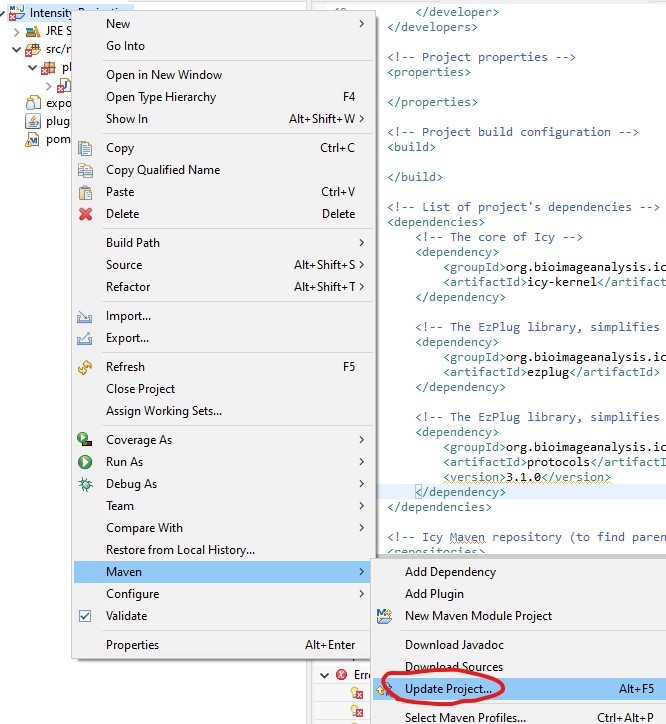
- We now require that Eclipse updates the project from the modified POM file. For that we right click on project root and select Maven –> Update Project…

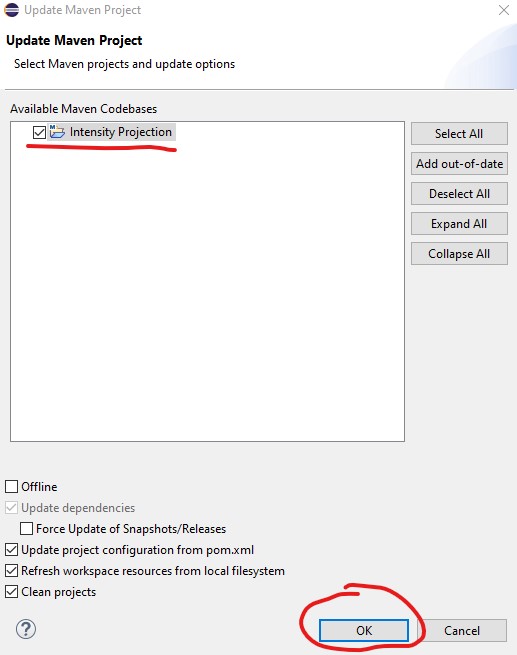
- We select our project and validate:

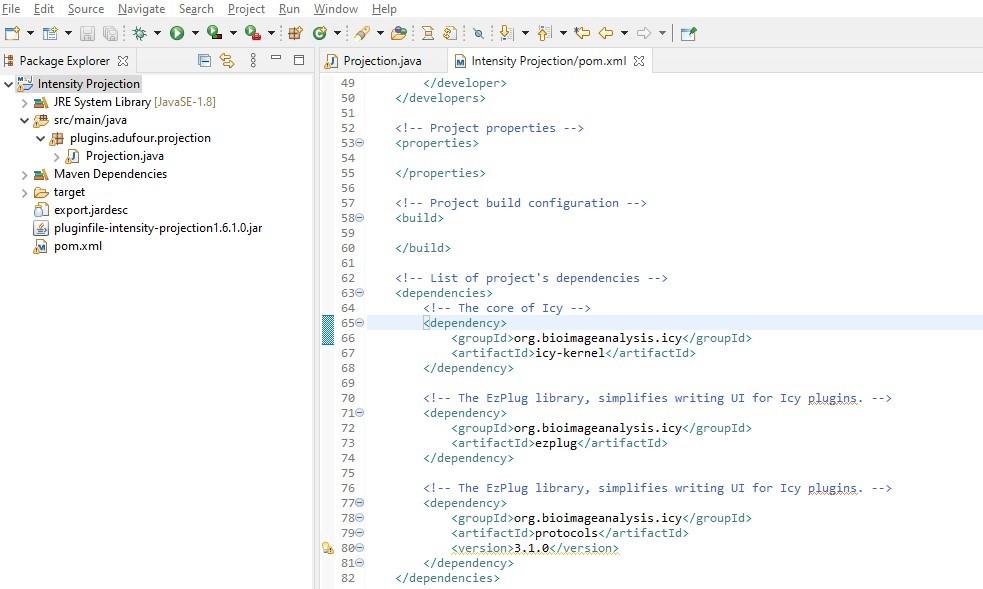
- Our project is now finally properly converted to a maven project!

Building the project
Now that we have our maven project, we may want to build it in the maven way. Eclipse had some options to automatically build a maven project, but it is important to know how to do it manually as well.
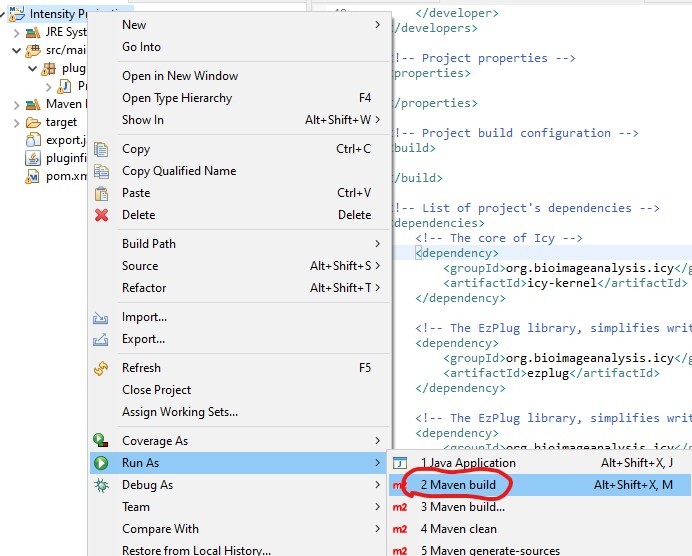
- To ask for a maven build we need to use the Run As –> Maven build command.

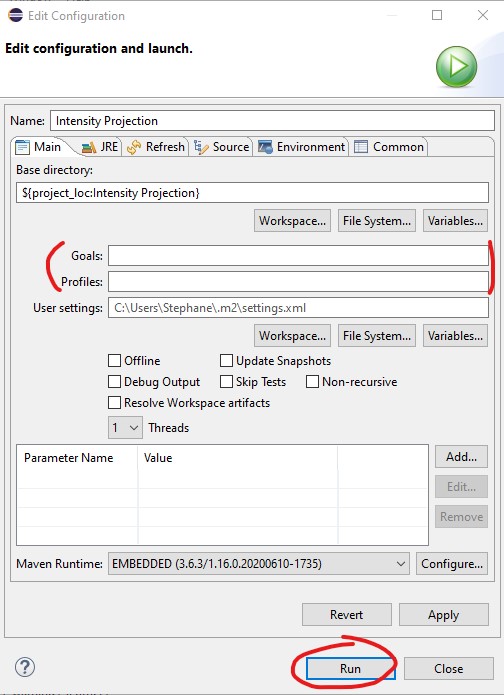
- A new window appears to ask some details (Goals and / or Profile) about the build process.
Hopefully the parent POM contains a default configuration for the build process, so we can leave both fields empty here and just click on Run:

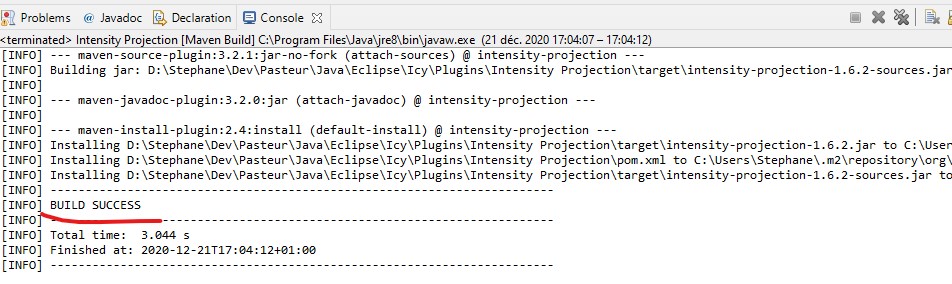
- That will launch the maven build process. Normally if everything went right, we should observe a BUILD SUCCESS message in the console output tab:

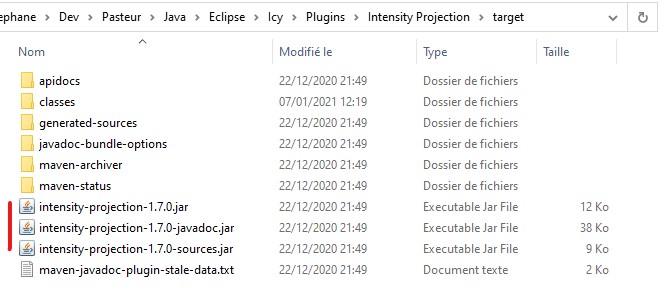
- We should also find the generated JAR files (binary, sources and javadoc) into the project target folder!

Note that you can also directly build from command line if you have maven installed. For that you just need to open a terminal / command line prompt, go to your project root folder and execute the following command:
mvn
And after some seconds you should see the same BUILD SUCCESS log as we had in Eclipse.
Testing
The last thing we need to be able to do now is to test our code. We cannot do it the same way as we did before, so here the most straightforward way of doing that is using the same method as in the plugin template.
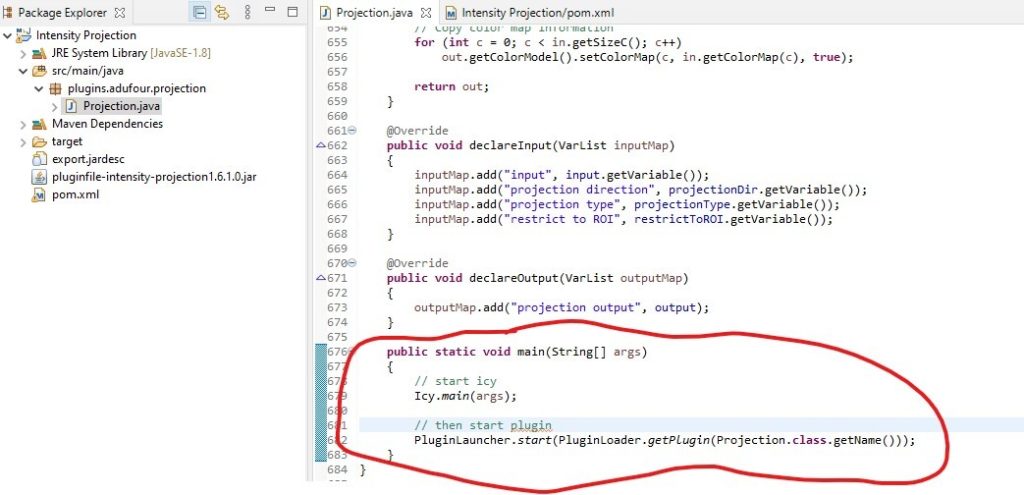
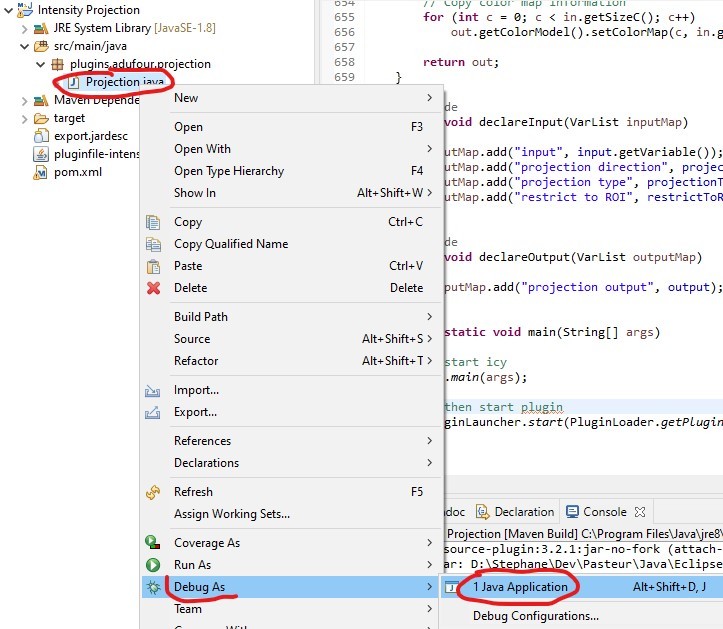
- We add a main(..) entry point in the plugin class so we can quickly execute it as standalone app. Internally it will launch Icy application then start the plugin:

- Then we directly Run / Debug the plugin class as a Java Application:
 After
After - Normally that should launch Icy. In some cases, we see this error message appearing because of some missing resources:

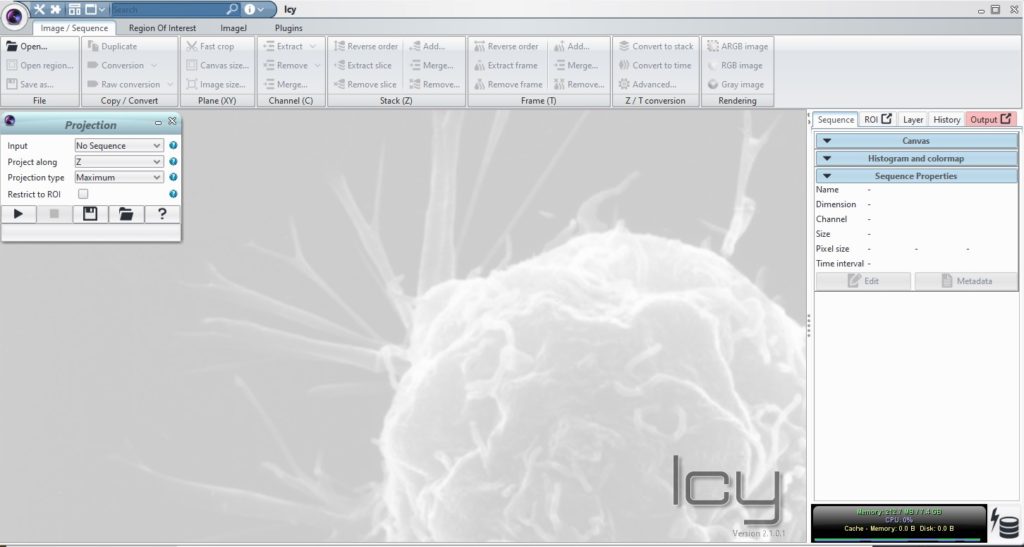
We just click on OK to ignore it. We will try to provide a workaround to avoid that in the future! - After some time we should see Icy opening and the plugin automatically starting:

 After
After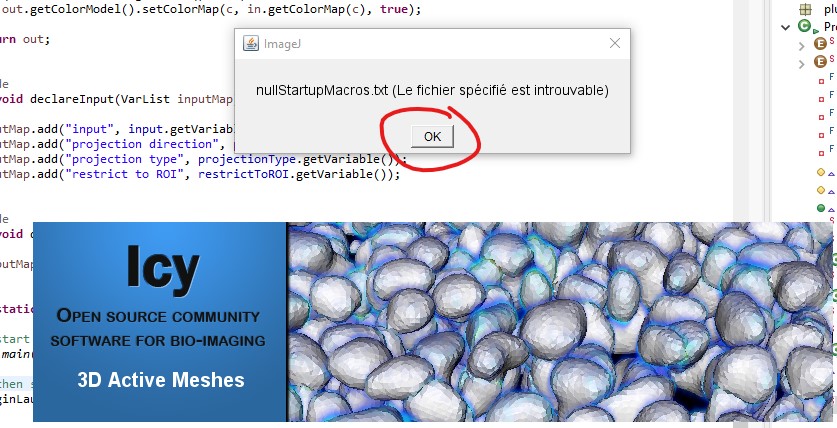
Congratulations!!! Your completed all steps to convert your plugin project to Maven. Hopefully this will allow you to work more efficiently in the future 🙂
Don’t hesitate to post a review about this guide if you don’t understand it or you think it can be improved in some parts. You can also ask Icy plugin development related questions on the image.sc forum, “Development” category, tag “icy”. Thank you!
2 reviews on “Migrate your old Icy plugin to maven”